
Партнерка на США и Канаду по недвижимости, выплаты в крипто
- 30% recurring commission
- Выплаты в USDT
- Вывод каждую неделю
- Комиссия до 5 лет за каждого referral
Instructions for Managing the Steve Franklin Band Web Site

Table of Contents
1 Changes Made to Your PC.. 2
1.1 Filezilla. 2
1.2 Desktop Folder 2
2 Filezilla. 3
2.1 About Filezilla. 3
2.2 Start Filezilla. 3
2.3 Connection Status. 3
2.4 Filezilla Interface. 3
3 Download Files from the Web Server 4
3.1 Download HTML Files. 4
3.2 Download Status. 4
4 Edit an HTML Web Page File. 5
4.1 Open the HTML File. 5
4.2 Edit the HTML File. 5
4.3 Save Your Changes. 5
5 Edit the “Music” Web Page File. 6
5.1 Get the YouTube Information for your video. 6
5.2 Edit the Music HTML File. 7
5.3 Target Frame. 8
5.4 Save the Music File. 8
6 Edit the “Photos” Web Page File. 9
6.1 Edit the Photos HTML File. 9
6.2 Get the Photo Bucket Information for your photo album... 11
6.3 Edit the Hyperlink. 11
6.4 Save the Photos File. 12
7 Upload Files to the Web Server 13
7.1 Upload HTML Files. 13
7.2 Upload Status. 13
7.3 Reload/Refresh the Web Site. 13
Last Updated: 5/21/11 – Jeff Franklin
2 Changes Made to Your PC
2.1 Filezilla
The program Filezilla was installed and will be used to download the files from the web server to your PC for updating. Once the files are updated, Filezilla will be used to upload the files back to the web server.
2.2 Desktop Folder
A folder has been placed on your desktop and has the name “”.
The files on the web server that you can edit are listed below. Once these have been downloaded to you local folder, you will be able to edit them using Microsoft Word. The file format for a web page is HTML which stands for Hyper Text Markup Language.
· Bio. htm
· Home. htm
· Music. htm
· Photos. htm
· Shows. htm
3 Filezilla
3.1 About Filezilla
Filezilla is a program that is used to transfer files from one computer to another using a protocol named “FTP” which stands for File Transfer Protocol. This program will be used to initially download the current files from the web site and will be used again once the files have been modified to transfer the updates back to the web server.
3.2 Start Filezilla
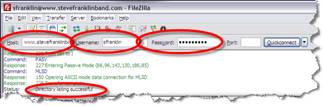
Start the Filezilla program from either the desktop icon or from the Start Menu / Program Group.
· Enter “www. ” in the “Host:” field.
· Enter “sfranklin” in the “Username:” field.
· Enter “steve123!” in the “Password:” field.
3.3 Connection Status
A “Status:” of “Directory listing successful” indicates that you have successfully connected to the web server.
3.4 Filezilla Interface
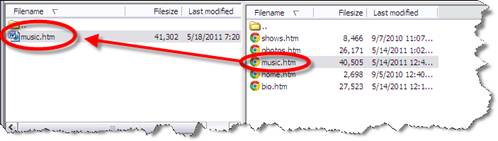
 In Filezilla, the left portion of the application shows the folders and files on your local PC while the right portion of the application shows the folders and files on the web server.
Here you will need to navigate to the folder on your local PC that contains the files you are downloading, modifying, and uploading.
 |
4 Download Files from the Web Server
If the HTML files on your PC are the latest version and are exactly the same as the files on the web server, then you do not need to repeat this process. You would only need to update/modify the files on your local PC and then upload them to the server when you are done and ready to make the updates on the server.
If you have someone else modify the HTML files on the server, you will need to download the updated files when you are ready to modify them otherwise the local version of the files on your PC will not contain the modifications others have made and if you upload your version, the modifications others have made, will be lost.
4.1 Download HTML Files
Start the Filezilla application.
In the left portion of the application, navigate to the folder on your desktop “”
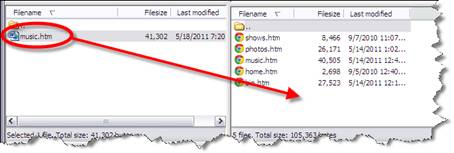
From the right portion of the application, drag and drop one of more of the HTML files (from the server) that you wish to update, to the left portion of the application (to your local folder).
4.2 Download Status
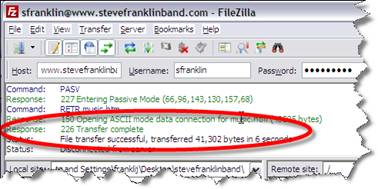
A status response of “Transfer complete” indicates that you have successfully downloaded the file(s).
5 Edit an HTML Web Page File
5.1 Open the HTML File
Using Microsoft Word, go to the “File” menu and select the “Open” command.
Navigate to the “stevefranklinband” folder on your desktop.
Select the file you wish to edit and click the “Open” button.

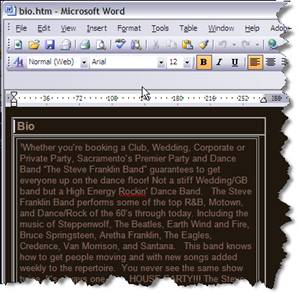
5.2 Edit the HTML File
The HTML file will now be open for editing in Microsoft Word.
5.3 Save Your Changes
When you are done making changes, save the file as you would any other Microsoft Word document.
6 Edit the “Music” Web Page File
6.1 Get the YouTube Information for your video
On the YouTube website, navigate to the video you wish to add to your web site.
Click on the “Share” button then click on the “Embed” button.
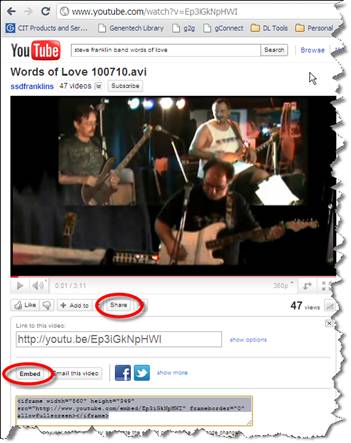
In the “Embed” section of the YouTube page, copy the URL section of the embed video. In this example the URL is “http://www. /embed/Ep3iGkNpHWI”.
6.2 Edit the Music HTML File
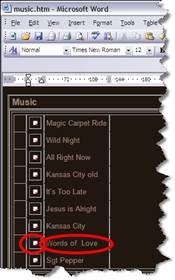
Open the “Music. htm” HTML web page file using Microsoft Word. You can edit one of the existing entries or copy the title and image icon to make a new entry.
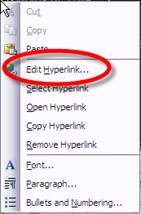
Modify the text title for a video and then right click on the image icon next to the title and select “Edit Hyperlink” from the pop up menu.
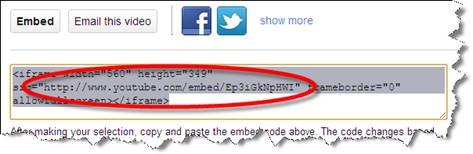
In the “Address:” field, enter/paste the youtube embed URL.

Paste the youtube embed code into the “Address:” field. Initially the URL will have other information before and after it from the YouTube site.

Remove all the text in front and behind the embed URL. Make sure the URL contains the word “embed”

Select the “OK” button to complete the process of linking the YouTube video to the icon on your page.
6.3 Target Frame
You shouldn’t need to do this but just in case you ever do… Make sure that the “Target Frame” value is set to “right”. This is the setting that tells the video to open in the right half of your web site. If it needs to be reset, you can do this using the “Target Frame” button.

6.4 Save the Music File
When you are done making changes to the “Music. htm” file, save the file as you would any other Microsoft Word document.
7 Edit the “Photos” Web Page File
7.1 Edit the Photos HTML File
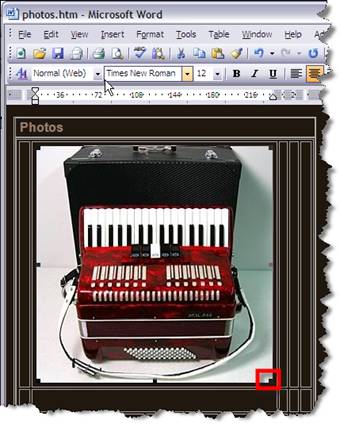
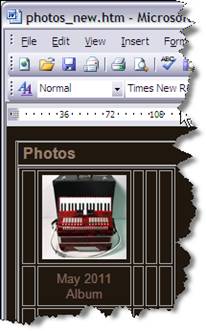
Open the “Photos. htm” HTML web page file using Microsoft Word. You can edit one of the existing entries or create a new entry by adding a thumbnail photo and entering a title for the photo.
Select a cell/box in the photos table that you would like to add a thumbnail photo to. With the cursor in the desired box, select the “Insert” menu and then the “Picture” sub menu and the “From File…” command.

Navigate to, and select the photo you would like to use as a thumbnail image. click the “Insert” button to complete your selection

The image may be too large. If this occurs, you can simply select the image and drag one of the corners inward to make the image an appropriate size.
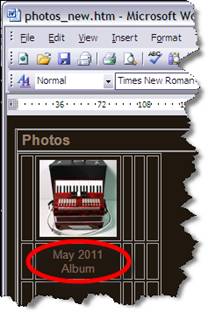
You can enter a title for your image and slide show by selecting a desire cell such as the one directly below the thumbnail image, and typing an appropriate title.
7.2 Get the Photo Bucket Information for your photo album
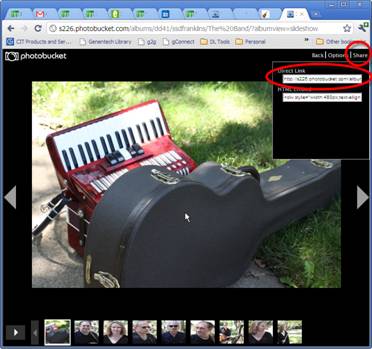 On the PhotoBucket website, navigate to the album and slideshow you wish to add to your web site and click on the “Share” command in the upper right corner, then click on the “Direct Link” field. This will copy the correct URL string to the clipboard for you.
In this example, the string for the slideshow is http:///albums/dd41/ssdfranklins/The%20Band/?albumview=slideshow.
7.3 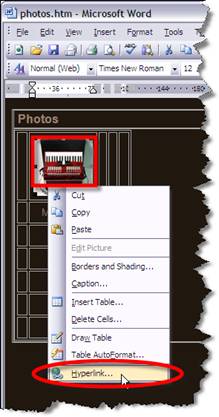 Edit the Hyperlink
Right click on the thumbnail image and select the “Hyperlink…” command.
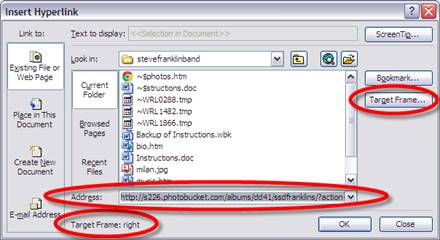
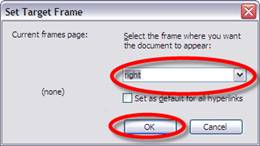 Select the “Address” field and paste the URL string that you obtained from PhotoBucket in the previous step. You will want your images or slideshow to open in the right half of the web site. To make this happen, we need to set the target frame equal to “right”. Select the “Target Frame” button and type “right” in the field. Select the “OK” button to return back to the “Insert Hyperlink” window.
Note that the target frame is displayed in the lower left corner of the “Hyperlink” window. Select the “OK” button on the “Hyperlink” window to complete the hyperlink process.
7.4 Save the Photos File
When you are done making changes to the “Photos. htm” file, save the file as you would any other Microsoft Word document.
8 Upload Files to the Web Server
Once you have updated the web site files and are ready to update the web site, you will need to upload the updated file(s) back to the web server.
8.1 Upload HTML Files
Start Filezilla.
In the left portion of the application, navigate to the folder on your desktop “”
From the left portion of the application (your local folder), drag and drop one of more of the files that you wish to upload, to the right portion of the application (the web server).
8.2 Upload Status
A status response of “Transfer complete” indicates that you have successfully uploaded the file(s).
8.3 Reload/Refresh the Web Site
Confirm that the updates are displayed as expected on the web server by using a web browser and entering the URL www. . Right click on the web page and select “Refresh” if you already had the website open. For most browsers, the “F5” key will also perform a refresh.
